One of the most frustrating things that has plagued my Unraid gaming VM setup has been that it doesn’t seem up to snuff when running games like iRacing. This as well as other single-threaded operations seem to run at a snails pace compared to what I’d expect. It turns out, this is partially a problem with AMD’s Zen 1 architecture compatibility with Linux. Unraid does not like to work well with the Zen architecture’s C-states, which must be disabled in the BIOS for system stability. However, doing so also seems to affect its Turbo Boost capability, as it will not single-thread boost up to the rated 3.7GHz. I’ll walk through what I did to enable, or work around at least, Zen 1 Turbo Boost in Unraid.
Diagnosis
First of all, the Unraid forums are a great resource, if you’re ever running into a problem, they’re a great place to go to piece together all the pieces of the problem you might be running into. However, not all of them are good solutions (see also ACS Override), but at least there are solutions. Luckily, someone had already built a very similar setup, and had documented some of their diagnoses.
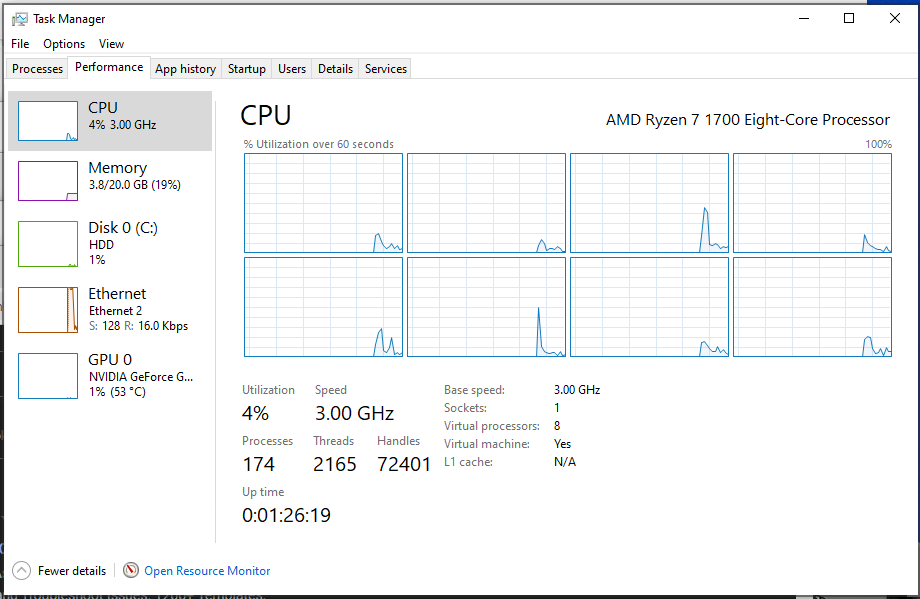
Since the processor is passed through to the VM in Unraid, Windows does not really know what to do with it and provides only the base clock information (likely from a database):
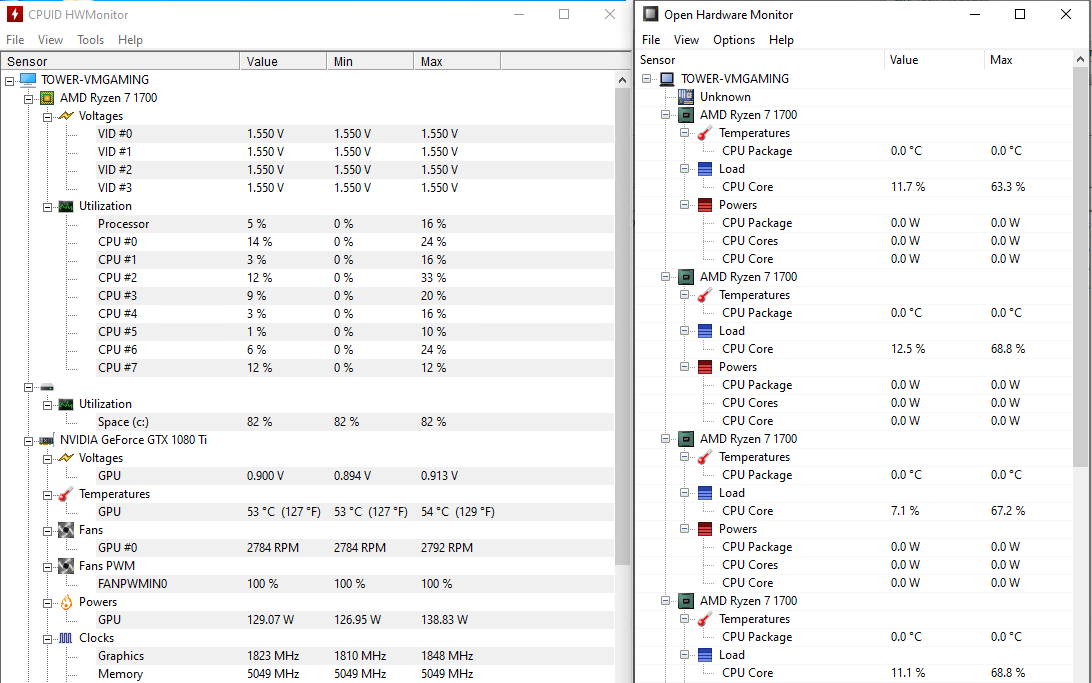
Even tools like HWMonitor and OpenHardwareMonitor don’t work well within the VM environment. HWMonitor shows incorrect voltages, for example, neither of them have package power, temperatures, or what’s most important to us: operating frequency.

What’s even worse is that the single-threaded workloads actually don’t show up as obvious as a single pegged core, and often show a distributed load. So, the only way we had to diagnose the system was to boot up one of the single-threaded applications and open up a terminal in Unraid:
watch -n 1 grep MHz /proc/cpuinfo
Every 1.0s: grep MHz /proc/cpuinfo                                                                  Tower: Sun Feb 28 15:24:08 2021

cpu MHz         : 1368.318
cpu MHz         : 1378.218
cpu MHz         : 1370.521
cpu MHz         : 1383.413
cpu MHz         : 1978.073
cpu MHz         : 3126.469
cpu MHz         : 1559.356
cpu MHz         : 3196.789
cpu MHz         : 1368.070
cpu MHz         : 1363.059
cpu MHz         : 1364.940
cpu MHz         : 1499.952
cpu MHz         : 1893.731
cpu MHz         : 3198.973
cpu MHz         : 1559.292
cpu MHz         : 3199.062
What we can see from above is that the 16 logical cores of the Ryzen 7 are downclocking, per normal, to save power since they are not being used. However, the VM is taxing some of the cores with a load, and as a result, these cores are being clocked up to 3.2GHz. This corresponds to the Ryzen 7’s multi-core turbo boost frequency, and is only marginally better than its base 3.0GHz clock. We want to try to hit 3.7GHz or higher when we have a workload from the VM that warrants it.
Ryzen P-States
Since we want to maintain system stability as well as maintain the ability for the system to keep its power consumption low (its main job is a NAS after all), the best way to solve this is through editing the processors performance, or P-states. These P-states (P0/1/2) are various dynamic clocking settings that are roughly based on processing load. These settings are in registers within the processor that can be modified by the OS / from within the OS. Luckily someone already came up with a script to help us out here.
Install Python through the Nerd Tools. I prefer Python3 since Python2 has been out of support since 2020.

Open up a terminal and copy-paste the script’s raw contents into vi /mnt/user/appdata/zenstates. Modify the first line to point to Python3, #!/usr/bin/python3. Then make the script executable, chmod +x /mnt/user/appdata/zenstates.
Now we have a script we can call anytime to dynamically set P-states whenever we want. We’ll translate the settings from this Google Spreadsheet, and call them like so:
# /mnt/user/appdata/zenstates -p 0 -f 9C -d 8 -v 20
Current P0: Enabled - FID = 78 - DID = 8 - VID = 3A - Ratio = 30.00 - vCore = 1.18750
Setting FID to 9C
Setting DID to 8
Setting VID to 20
Locking TSC frequency
New P0: Enabled - FID = 9C - DID = 8 - VID = 20 - Ratio = 39.00 - vCore = 1.35000
As you can see from the above trace, the default settings match up with the 3.2GHz multi-core boost that is typical of the Ryzen 7 1700. This is confirmed by the voltage setting in the spreadsheet. I was able to actually surpass the 3.7GHz turbo of the 1700 all the way to 3.9GHz on the stock voltage of the 1700X/1800X. Since this is still within the stock parameters of others in the series, I chose not to go higher for sake of stability, though lots have done so for a gaming machine.
Performance Comparison
In order to see how much this changes the system performance, we can compare performance live before and after running the zenstates script by running Cinebench. We’ll take a look at before and after in Cinebench R23 (the latest version).
| Cinebench R23 (before) | Cinebench R23 (after) | |
| Single-Core Score | 759 | 914 |
| Multi-Core Score | 3712 | 4525 |
The similar system that we’ve compared ourselves to before notes that they used Cinebench to test their setup as well. However, they do not note which version of Cinebench they used, nor how many cores were in their VM. In addition, my RAM is running a mid-tier XMP profile of 2933MHz versus their 2400MHz. Based on the post’s timestamp, we’ll assume it’s Cinebench R20, which was released the month prior.
| Cinebench R20 | Comparison System | |
| Single-Core Score | 356 | ??? |
| Multi-Core Score | 1733 | 1420 |
The comparison system does not note whether it was a multi-core or single core score. However, since the default in R20 is a multi-core score, we’ll assume that’s what they meant. The extra speed I’m experiencing given that I was able to hit the same frequencies they did, is either because they had 3C/6T on the VM or due to the 2933MHz vs 2400MHz RAM.
Finally, there’s temperature. Given we’re only clocking half the cores up to 3.9GHz under a sustained load, it means we don’t put a lot of heat into the package. This means even with the stock Wraith Spire, a sustained single-threaded Cinebench run popped up the package temp to 40C, and a multi-threaded Cinebench run topped out at 55C.
Automation
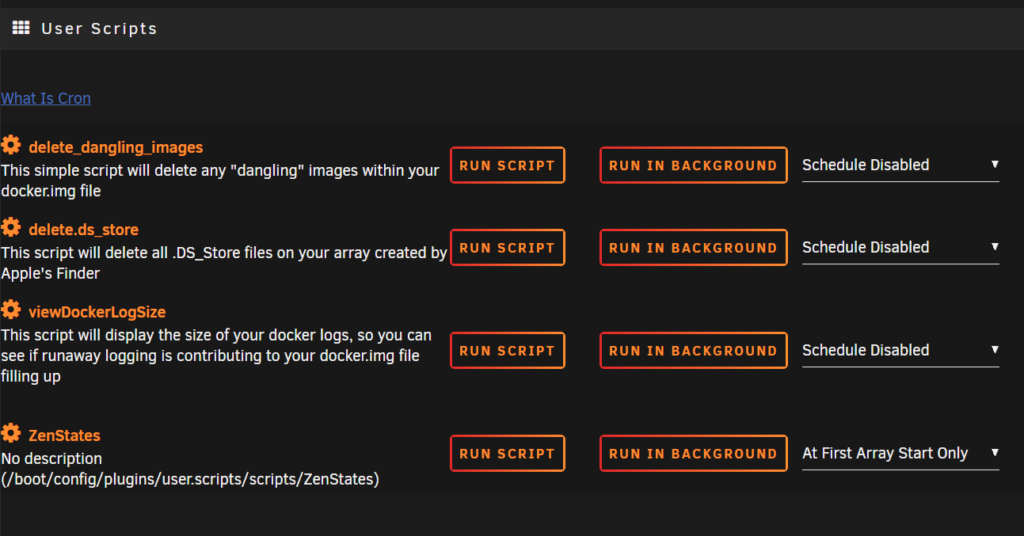
The final piece of the puzzle is to make this run automatically at start up. We can use the User Scripts community plugin to do this easily through the GUI. Create a new Script, and I chose to run it only at the first array start so that it’s ready for VMs who live on the array. There’s not need to run it more often than that:

Now edit the script itself by clicking on the Settings (gear icon) next to the script, and Edit Script:

Given you’ve already placed the zenstates script in appdata we can simply call it with the settings that you verified above:
#!/bin/bash
/mnt/user/appdata/zenstates -p 0 -f 9C -d 8 -v 20
Conclusion
Now, the Ryzen 7 1700 at the heart of my NAS will be able to clock up to 3.9GHz under load from the VM (or otherwise). This should give my single-threaded games about a 20% performance boost. We can see during one of the Cinebench runs, all cores assigned to the VM were boosting to 3.9GHz now:
Every 1.0s: grep MHz /proc/cpuinfo                                                                  Tower: Sun Feb 28 19:25:11 2021

cpu MHz         : 1900.124
cpu MHz         : 1580.437
cpu MHz         : 1613.536
cpu MHz         : 2047.121
cpu MHz         : 3885.629
cpu MHz         : 3848.398
cpu MHz         : 3899.685
cpu MHz         : 3899.182
cpu MHz         : 2070.978
cpu MHz         : 1582.400
cpu MHz         : 1568.428
cpu MHz         : 1521.636
cpu MHz         : 3897.633
cpu MHz         : 3895.696
cpu MHz         : 3899.253
cpu MHz         : 3899.102
References
- https://forums.unraid.net/topic/61129-ryzen-freezes/
- https://www.reddit.com/r/Amd/comments/cik3q1/can_we_recognize_broken_c6_states_in_all_of_zen/
- https://forums.unraid.net/topic/72062-ryzen-build-gamer-nas-server/
- https://forums.unraid.net/topic/74894-zenstates-fixing-the-problem-where-gen1-ryzen-wont-boost-in-unraid/
- https://github.com/r4m0n/ZenStates-Linux
- https://man7.org/linux/man-pages/man4/msr.4.html
- https://en.wikipedia.org/wiki/Cinema_4D
- https://docs.google.com/spreadsheets/d/1icKFa0COFFpIKmkXOXVUrTt7mnMqdYYLbtRiedat5zs/edit#gid=1716614165
- https://www.amd.com/en/products/cpu/amd-ryzen-7-1700
- https://www.amd.com/en/products/cpu/amd-ryzen-7-1700x

