I decided recently to move on from my Synology NAS as the core storage / server device in my network infrastructure. I have re-purposed my previous gaming machine to become a heavier-duty server. There will be more to come on this setup later. I chose unRAID because I wanted it to also serve dual-duty as a living room gaming machine. One of the major advantages of unRAID is that it provides a good front-end to KVM virtualization under the hood. In order to enable nearly bare-metal performance on a VM, you have to direct-pass through a GPU to the VM. However, as we find this is not straightforward with nVidia cards.
Background
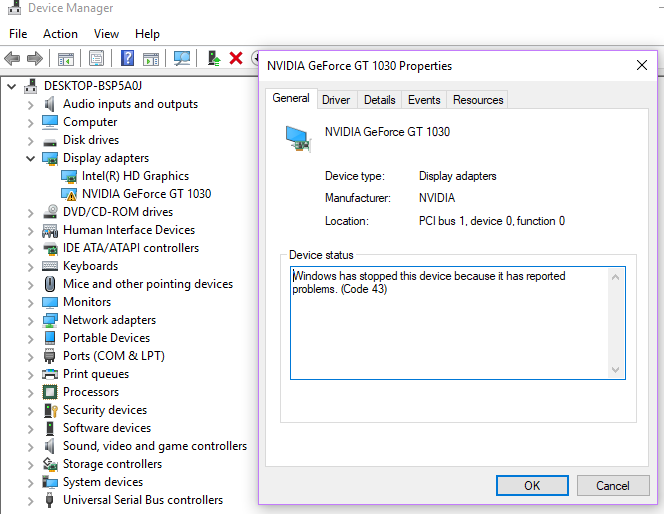
nVidia unfortunately limits its GeForce gaming cards in software by recognizing a virtual environment and preventing its use. They would much prefer that you use their workstation cards in virtual (read: lucrative server) environments. As a result, you will find that it results in a black screen output of the GPU, or a failure to initialize in Windows Device Manager:

Solving this problem used to be relatively easy: disabling some features in unRAID, such as Windows’ HyperV tweaks that are included. However, when I tried to disable Hyperv, unRAID seemed to not save the change ever. unRAID could be preventing this change once a VM is created, but I didn’t want to go down the path of creating another VM from scratch.
There are still other suggestions that the card should be installed in a non-primary slot given how the GPU is attached and initialized with the host OS. However, I also didn’t want to rearrange the hardware, so I figured it had to be solvable another way.
As much as other guides note a relatively simple setup, I was not able to get it working out of the box. As a result, the only real solution was to download and modify the VBIOS.
How-To
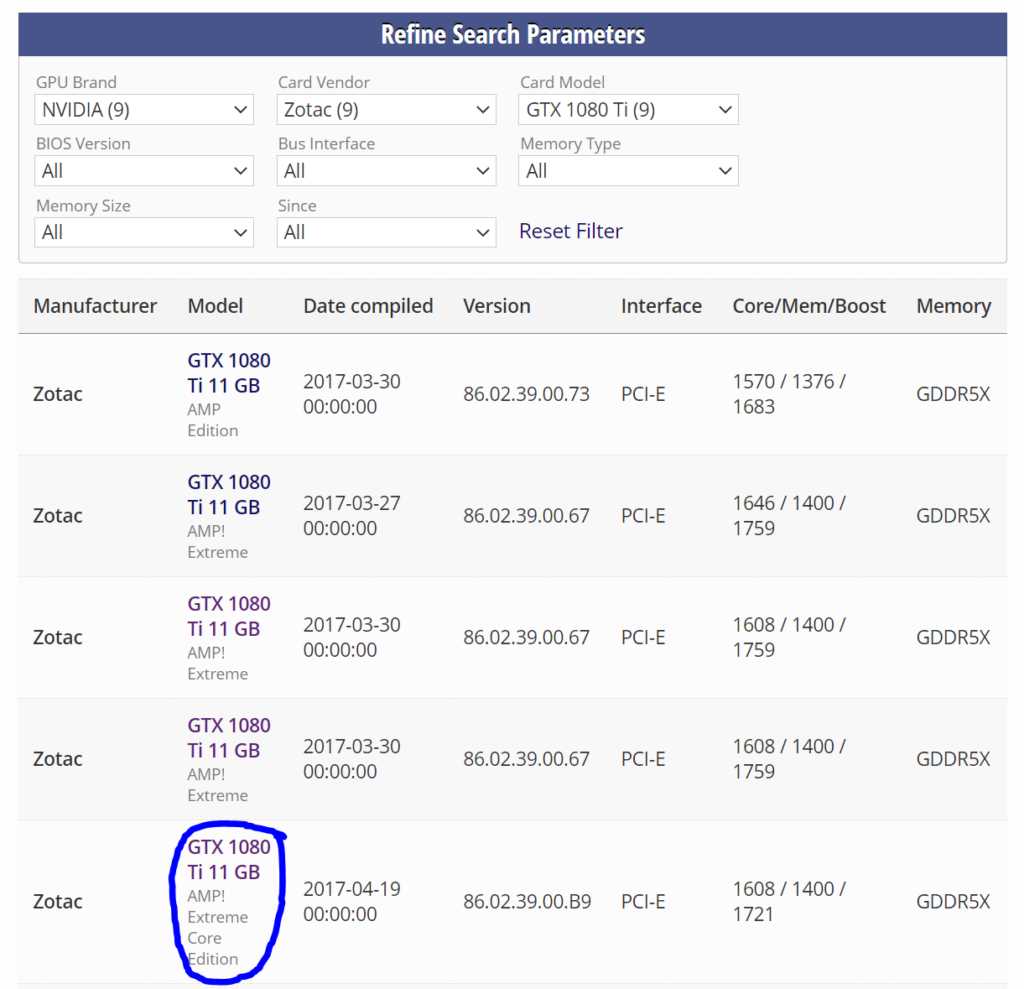
First of all, download the VBIOS from TechPowerUp, make sure you find your EXACT card. I was using a Zotac AMP! Extreme Core Edition 1080Ti:

Once you have that downloaded you can download the tool from Matoking directly here: https://raw.githubusercontent.com/Matoking/NVIDIA-vBIOS-VFIO-Patcher/master/nvidia_vbios_vfio_patcher.py. This tool will help us patch the VBIOS to work with VFIO and libvrt, removing the “arbitrary DRM” from nVidia.
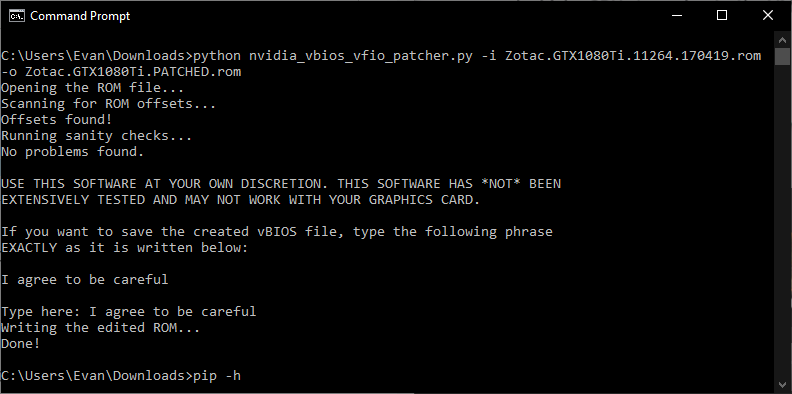
Then open up a command prompt, and navigate to your downloads folder. Enter the following command and follow the prompts:
python nvidia_vbios_vfio_patcher.py -i <ORIGINAL_ROM> -o <PATCHED_ROM>
Once you’ve done this, you have to move this file to somewhere unRAID can read it (usually on the /isos share on the unRAID server, e.g. /mnt/user/isos/Zotac.GTX1080Ti.PATCHED.rom). Then you can change the VM to pass this VBIOS through to KVM in the unRAID options:

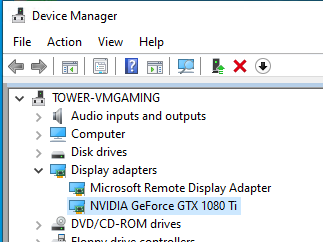
Once you’re done, you should be able to boot up the VM and be welcomed with a functioning GPU in Device Manager:

Note that this can also be done with KVM itself apart from unRAID, but I won’t go into that here.
Conclusion
This was the biggest gotcha for me to get a VM with GPU passthrough up and running with KVM / unRAID. By the sounds of things, this may have gotten easier with newer GPUs, but I’ll save that for when I can get my hands on some 30-series GPUs. For now, a 1080Ti will suffice for my currently limited need for living-room PC gaming. I will post more about how unRAID was setup for myself in the future.