![synology_610x425[1]](http://www.elaske.com/wp-content/uploads/2013/11/synology_610x4251-300x209.png) In order to start working on my Synology JIRA package, I needed some way to test without having to sacrifice the stability of my own DiskStation. In order to do this, I decided to use VMware Fusion. This is a guide showing one way to do so:
In order to start working on my Synology JIRA package, I needed some way to test without having to sacrifice the stability of my own DiskStation. In order to do this, I decided to use VMware Fusion. This is a guide showing one way to do so:
An older guide that uses VirtualBox can be found here: http://www.robvanhamersveld.nl/2013/01/21/install-and-test-synology-dsm-in-a-virtual-machine/.
XPEnology
XPEnology is a custom bootloader that emulates the Synology bootloader. For more information on the group and what XPEnology is, check out their intro: http://xpenology.me/introduction/.
Get the latest DSM (or the DSM you want to test with) on their downloads page. I am using their DS3615xs5.2-5644.4 build (for DSM 5.2 build 5644). The ISO / IMG / VMDK files are the bootloader images; we’ll use the ISO file to make it easier to install. There are also PAT files for those who already have a DSM installation and need to upgrade.
Link for the lazy: ISO image.
Creating the Virtual Machine
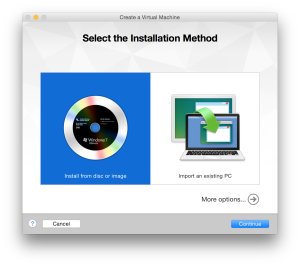
- Open VMware Fusion and create a new virtual machine.
- Select “Install from disc or image” and click Next.
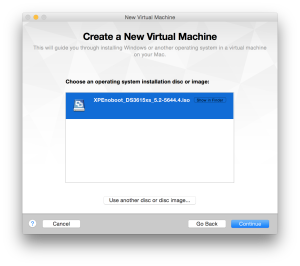
- Click “Use another disc or disc image…” and find the ISO file that you downloaded, then click Continue.
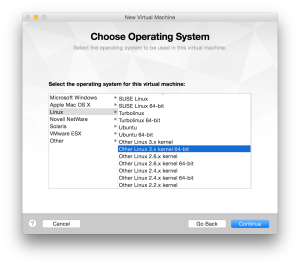
- We’ll have to manually select the linux kernel for this VM as it has no knowledge of what Synology / XPEnology is. Synology uses a 3.10 kernel and from DSM5 on it’s been 64 bit. Select “Linux” and then select “Other Linux 3.x kernel 64-bit”.
- You’ll get a summary of the hardware VMware is creating.
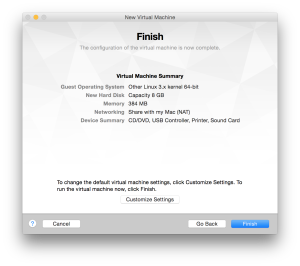
- We’ll want to customize it a bit, so click “Customize Settings.” Save the VM; it will open the settings dialog once you do.
- Go to “Processors & Memory” and increase it to at least 2 processor cores and 3GB of RAM
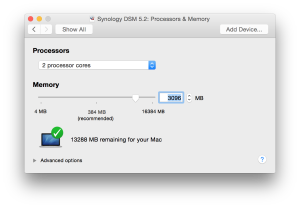 I’m trying to emulate the power of my DS1812+, which is a dual-core atom and 3GB of RAM.
 - Go to “Hard Disk” and increase it to some meaningful size. I used 20GB because that should be enough for testing.
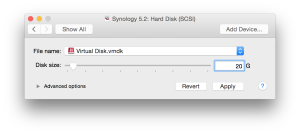
- OPTIONAL: Add a second hard disk. Click “Add Device”. Select “New Hard Disk”. Set up the hard disk to at least match the settings in step 8.
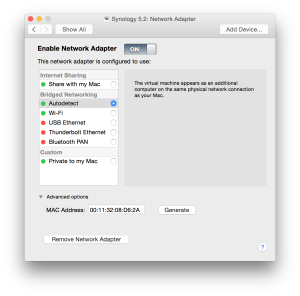
- Go to “Network Adapter” select “Bridged Networking”->”Autodetect” and change the MAC Address to 00113208D62A. This is required so that the Synology Assistant can find the VM.
Install XPEnology
We’ll need the Synology Assistant to get the VM up and running like it’s a real DiskStation: https://www.synology.com/en-us/support/download/DS1812+. This link should work for all DiskStations, the DS1812+ is just the one I have. Download and install it.
- Start the VM. Select “XPEnology DSM <YOUR INSTALL> Install / Upgrade”
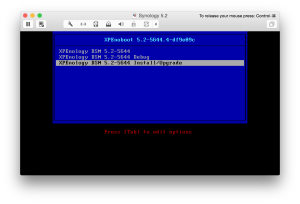
- Wait for it to boot. It will ask for “DiskStation login”:
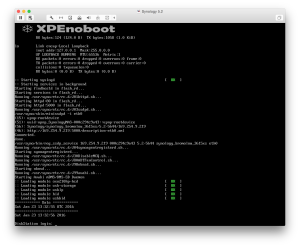
- Start Synology Assistant. It will automatically search for Synology products. If it doesn’t find your VM, try hitting search again – sometimes it doesn’t get all of them, especially if it just booted.
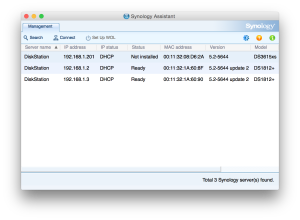 As you can see, my live DiskStations also show up, but they’re noted as “Ready” versus the VM’s “Not installed.”
 - Right click on the VM DiskStation and click “Connect”. This will load the Web Assistant and guide you through the setup process as if it was a real DiskStation:

- Follow the setup process normally.
Nominal Boot Configuration
You’ll need to make sure the VM continues to start off the ISO image, or you’ll have to switch over to using the VMDK that XPEnology provides.
Here’s how to make it work:
- Go to the VM settings
- Click “Add Device”.
- Select “Existing Hard Disk”.
- Find the VMDK you downloaded
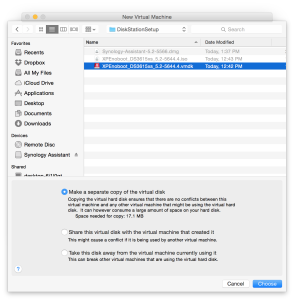
- Click “Choose” and then “Apply”.
- Go back to the VM settings.
- Click “Startup Disk” and select the new disk that you created.
- Click “Restart…” and it will restart the system using the new disk.
From now on, it’ll boot right up!
Note, however, that the VMDK that you’re using will show up as a disk in the DiskStation. This means that you’ll have to deselect it whenever you create / edit volumes.
Hello,
Have you tried Docker container wrapped JIRA? I have a DS1815+ and installed JIRA/CONFLUENCE within Docker to try how it works.
R
I have not. I haven’t had an issue getting them to run at all; the purpose of the VM installation was to create a virtual DSM. This way I can perfect a Synology package to use to install JIRA and Confluence.
I might have to look into using the Docker support in DSM 6.0 to use as containers for those JIRA / Confluence packages in future.